
The first week I owned a cane, I used it at the wrong height and did not know it. I set it to a number that looked about right against my leg, walked one grocery store, and came home with a sore wrist and a shoulder that ached for two days. The cane was not the problem. The height was. I am 68 years old, 5 foot 4, and I bought the HONEYBULL folding cane last November after a long grocery trip left my right knee aching on the walk to the car. It took me three tries and the tape measure from my kitchen junk drawer to get it where it belongs, and the gap between wrong and right was two inches.
Here is what a wrong height actually feels like, because the catalogs never say. Your shoulder climbs toward your ear on the side you are holding the cane. Your wrist bends back, like you are pushing a door open with the flat of your hand. Your steps get short. After twenty minutes your hand is tired, and after an hour your shoulder is talking to you. None of that reads as a cane problem. It reads as your body wearing out, so people blame their knees and give up on the cane. Most of the time the cane is fine and the setting is wrong. Here is how I found mine, in five steps, and how you can find yours in about ten minutes with a tape measure.
The cane that let me stop guessing: 30 to 36 inches, set with a push button
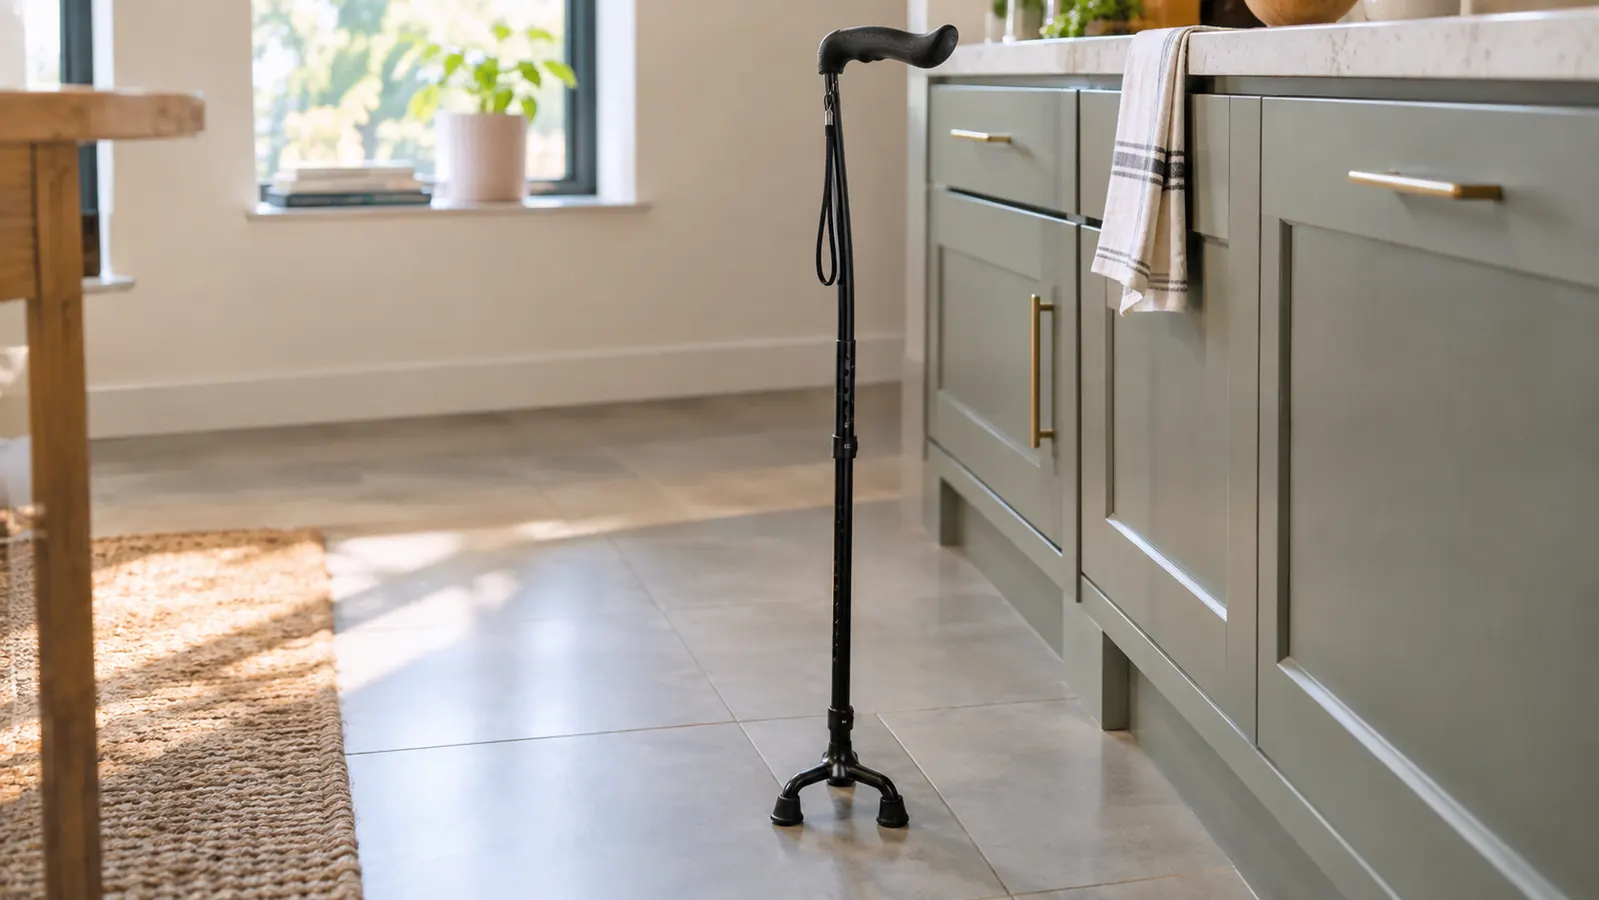
The HONEYBULL folding cane is aluminum, folds to about 12.5 inches, and stands on its own on a three-tipped base. It adjusts from 30 to 36 inches, which covers people 5 foot to 6 foot 5, and mine has sat at 32 inches for twelve months. Measure your wrist crease before you order. Then set it once and check the lock.
Amazon Check Today's Price on Amazon →Five Steps, In the Order I Did Them
Step 1: Measure standing up, in the shoes you actually wear
I did this in my own kitchen, on the tile, with my back against the wall. Stand as straight as you comfortably can and put on the shoes you wear out of the house, not your slippers. This matters more than people think. A soft house shoe and a walking shoe can be half an inch apart, and half an inch under your hand is enough to change how the cane sits. I wear the same flat, closed-back shoes to the grocery store that I wear to church, so that is what I measured in. If your good shoes are different from your everyday shoes, measure in the everyday pair and adjust the cane for the good pair when you get home.
If standing for a minute is hard, do not skip this part, just do it seated. Sit on a hard chair with your feet flat and your back against the chair, let the arm hang, and measure from the floor to the same spot on your wrist. It is a little less exact than standing. It is far better than guessing. And if you cannot get a number you trust, ask your doctor or a physical therapist to check the fit. I am not either one of those. I am a woman with arthritis in her right knee who got this wrong twice before she got it right.
Step 2: Measure to the crease of your wrist, not to your hip
Let your arm hang loose at your side, the way it does when you are not thinking about it. Find the crease on the inside of your wrist, the line where your hand bends back. Measure from the floor to that crease. That number, in inches, is your cane height. Not the floor to your hip. Not the floor to the top of your leg. The crease. I had been measuring to my hip for weeks, which is why my first cane setting was short and my shoulder was up around my ear.
If you want a second opinion from your own body, use the old half-your-height rule. I am 5 foot 4, which is 64 inches, and half of that is 32 inches. My wrist crease also measured 32 inches. When the two methods agree, stop worrying and go get the cane. When they disagree by two inches or more, measure again, and this time have somebody else hold the end of the tape. It is surprisingly hard to read a tape measure at floor level while standing up straight.
Step 3: Match your number to a cane that can actually reach it
The cane I use is the HONEYBULL folding cane, and I am giving you its numbers because numbers are where people get sold the wrong thing. It adjusts from 30 inches to 36 inches with a push button and the listing says it fits people from 5 foot to 6 foot 5. My 32 sits in the middle of that range with room on both sides. If your wrist crease measures 28 inches, or 38, this is not your cane, and no amount of adjusting will make it one. Buy the cane that fits the body you have.
A fixed-length cane bought online is a gamble. A cane that adjusts only an inch either way is a smaller gamble. Get something with real range, so that when your shoes change, or your posture changes, or your knee has a bad month, you have somewhere to go. And write your number down before you shop. I have watched people lift canes off a rack and hold them up beside themselves in the aisle, and I have been that person, and it is not a measurement. It is a guess with a handle on it.
Step 4: Set the pin, then test it like you mean it
Once you have your number, set the cane and then prove the setting. On mine you push the button, slide the tube to the height you want, and let the pin drop. When it drops, it clicks. Press the tip of the cane down hard on the floor, the way you would if you were leaning your weight on it, and listen for that click a second time. If it slid, it was not locked, and you just found that out in your kitchen instead of in a parking lot.
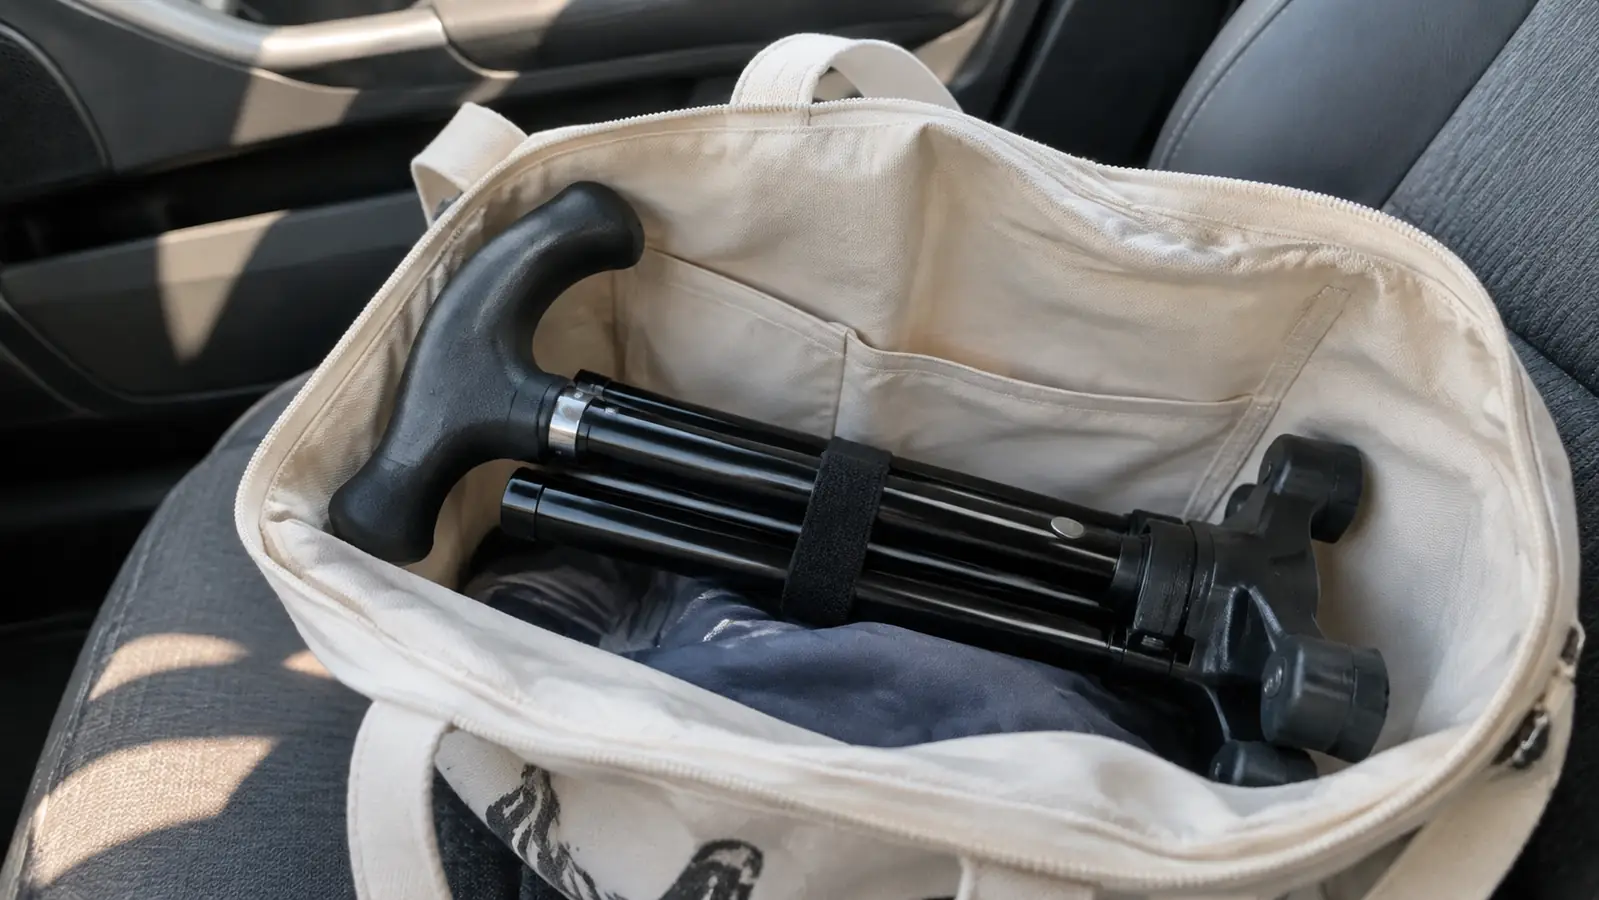
Check the lock every couple of weeks, and check it every single time you unfold the cane after it has been folded up in a bag or rattling on the passenger seat of the car. Mine folds to about 12 and a half inches, which is why it lives in my tote bag on the days I am not using it. A cane that has been folded and unfolded a hundred times is a cane that deserves a hard press on the floor before you lean on it. This takes two seconds and it is the whole safety lesson.
Step 5: Try it in your own kitchen before you trust it in a parking lot
Stand up and put your hand on the grip. Your elbow should be bent a little, not locked straight and not folded up. Your wrist should be flat, not bent back like you are pushing a door. Your shoulder should be down where it belongs. Walk the length of your kitchen and back, then walk it again and pay attention to your shoulder, because a wrong height shows up there first. If your wrist is bent back or your shoulder is climbing, the cane is too low. Go up one setting and walk it again.
Give it two weeks before you decide anything. My first two weeks with a cane felt strange, and I was sure every person in the grocery store was looking at me. That passed. What did not pass the first time was a wrist that ached after twenty minutes, and that was the height talking, not the cane. I went up one setting, walked the kitchen again, and the ache went away. If yours does not go away after a couple of honest adjustments, put the cane down and have your doctor or a physical therapist look at how you are standing and walking. There is no prize for toughing it out.

The Mistake I Made Twice
I got it wrong twice, so let me save you the trouble. The first time, I measured to my hip and ended up two inches short. A short cane makes you lean forward and down, and leaning feels like support for about ten minutes. Then the shoulder starts complaining and your steps get small. The second time, I overcorrected and set it too tall, because a tall cane feels like more help when you are nervous about a wet floor. A tall cane pushes the shoulder up and makes you hitch along. Both settings felt fine in the kitchen. Both fell apart in a store.
The third try stuck. Thirty-two inches, checked on my tile, checked again after unfolding it in the parking lot, and it has not moved since. If you have already bought a cane and it is not working for you, do not throw it out yet. Measure your wrist crease, set the cane to that number, press the tip down hard to make sure the pin is seated, and try it for a week. There is a good chance the cane was never the problem.
I set mine at 32 inches. At 30 my wrist was bent back and my shoulder was climbing toward my ear. Two inches was the difference between leaning on a stick and walking with one.
What Else Helps
Hold the cane in the hand opposite your bad joint. My right knee is the bad one, so the cane goes in my left hand. It feels wrong for about a week and then it stops feeling like anything. Hold it on the same side as the bad knee and you will lean instead of walk, and the cane will not do the job it is there to do.
The base matters more than I expected. Mine has a three-tipped base about four inches wide and it stands up on its own, which sounds like a small thing until you are at the checkout with your wallet in one hand and the cane has to wait. It stays up while I get my card out. On flat ground it is steady. On loose mulch in my daughter's flower bed I set it down carefully and do not drag it, and I would not take it on a hiking trail. It is a cane for stores, sidewalks, parking lots, and the walk around the lake.
The other things that helped me were smaller than the cane and easier to find than you would think. Shoes with a firm back. A cushioned mat in front of the kitchen counter, because I still cook Sunday dinner for my daughter and her husband and that is two to three hours on my feet. A knee wrap on the bad knee for the long cooking days. A mat is not a cane and a cane is not a mat, and none of them treat anything. They make an afternoon easier, which is all I was ever asking for. Before you buy any of it, talk to your doctor about your knee and about your walking, and ask whether a cane, a brace, or a few visits with a physical therapist is the right next step for you. That conversation is worth more than anything in this article.
Thirty to thirty-six inches, one push button, and a base that stays up on its own
The HONEYBULL folding cane is the one I set at 32 inches twelve months ago and have not had to think about since. It folds to about 12.5 inches for a tote bag, and it stands on its own while you dig for your wallet at the register. Measure your wrist crease first. Then check the current price.
Amazon Check Today's Price on Amazon →